Monday, December 29, 2014

Insulating the Bedroom and Bathroom Crawl Space

It's amazing how much Gene is able to do by himself on our stone house. But, he can always use an extra pair of hands and I want to help him as much as I can. So I put on my Tyvek suit, respirator, gloves and a hat...I was ready to go under.

It's nasty work, but someone has to do it. If you're claustrophobic, this job and the 2nd video may not be for you!

Before you can insulate, you have to measure and cut. Gene would give me a number and I would cut to size.


CLICK HERE FOR VIDEO
That was my main job. Gene did most of the dirty work, but I did have to crawl under myself. Take a look below.
CLICK HERE FOR VIDEO

Now our bathroom and bedroom will be extra cozy!

Tuesday, December 23, 2014

A Heart Felt Holiday Love Story

Here's a little stop motion video I created of Lindy and Geno building a snowman. I wish all of my followers and visitors a very Happy Hanukkah, a festive Merry Christmas, and a joyful Happy New Year!

CLICK HERE


Friday, December 19, 2014

Stone House Renovation: Preparing stone wall

Here's a video of Gene preparing the fireplace wall. He's installing strips of wood over the stone (it's called "furring") so we can level out the surface for our finished wall. We thought about keeping the stone exposed, but it's not in really good shape and not that attractive up close.

We want to do something fun and interesting with it, so we're going to cover it with plywood first and then create a pattern with rough hewn wood. We think the contrast of the wood and stone will be a great focal point in the living room.


Or click here

Monday, December 15, 2014

DIY Twinkling Twig Candle Holder

Simple DIY Twinkling Twig Candle Holder


Here's a simple and festive DIY candle holder project.


1. Gather your twigs, I used Forsythia branches. 2. Cut them into smaller pieces. 3. Coat with Mod Podge. 4. Sprinkle on your glitter. 5 and 6. Cut off the top of your white cup, leaving about 1/2"of the bottom. 7. Apply white glue or use a glue gun, and press your glittered branches into the glue. Let dry, insert your candle and enjoy the twinkling glow.


Closeup of Glittered Branches


Saturday, December 13, 2014

DIY Holiday Shadowbox

A shadow box is a "deep frame" that's used for displaying 3D items...mostly mementos. I made this one to celebrate the holidays.


Here are the supplies you'll need:


I used a wood box I had on hand, separated the two pieces and worked with just the lid. I painted the lid white, printed out the background art and glued that to the inside. I added some glue to the outside rim of the box and sprinkled on some white glitter.

I made the trees with green fabric, but green paper would work too.


I then added some white paint to the tops of the trees, brushed the trees with glue and sprinkled on some green glitter. I love how they sparkle.

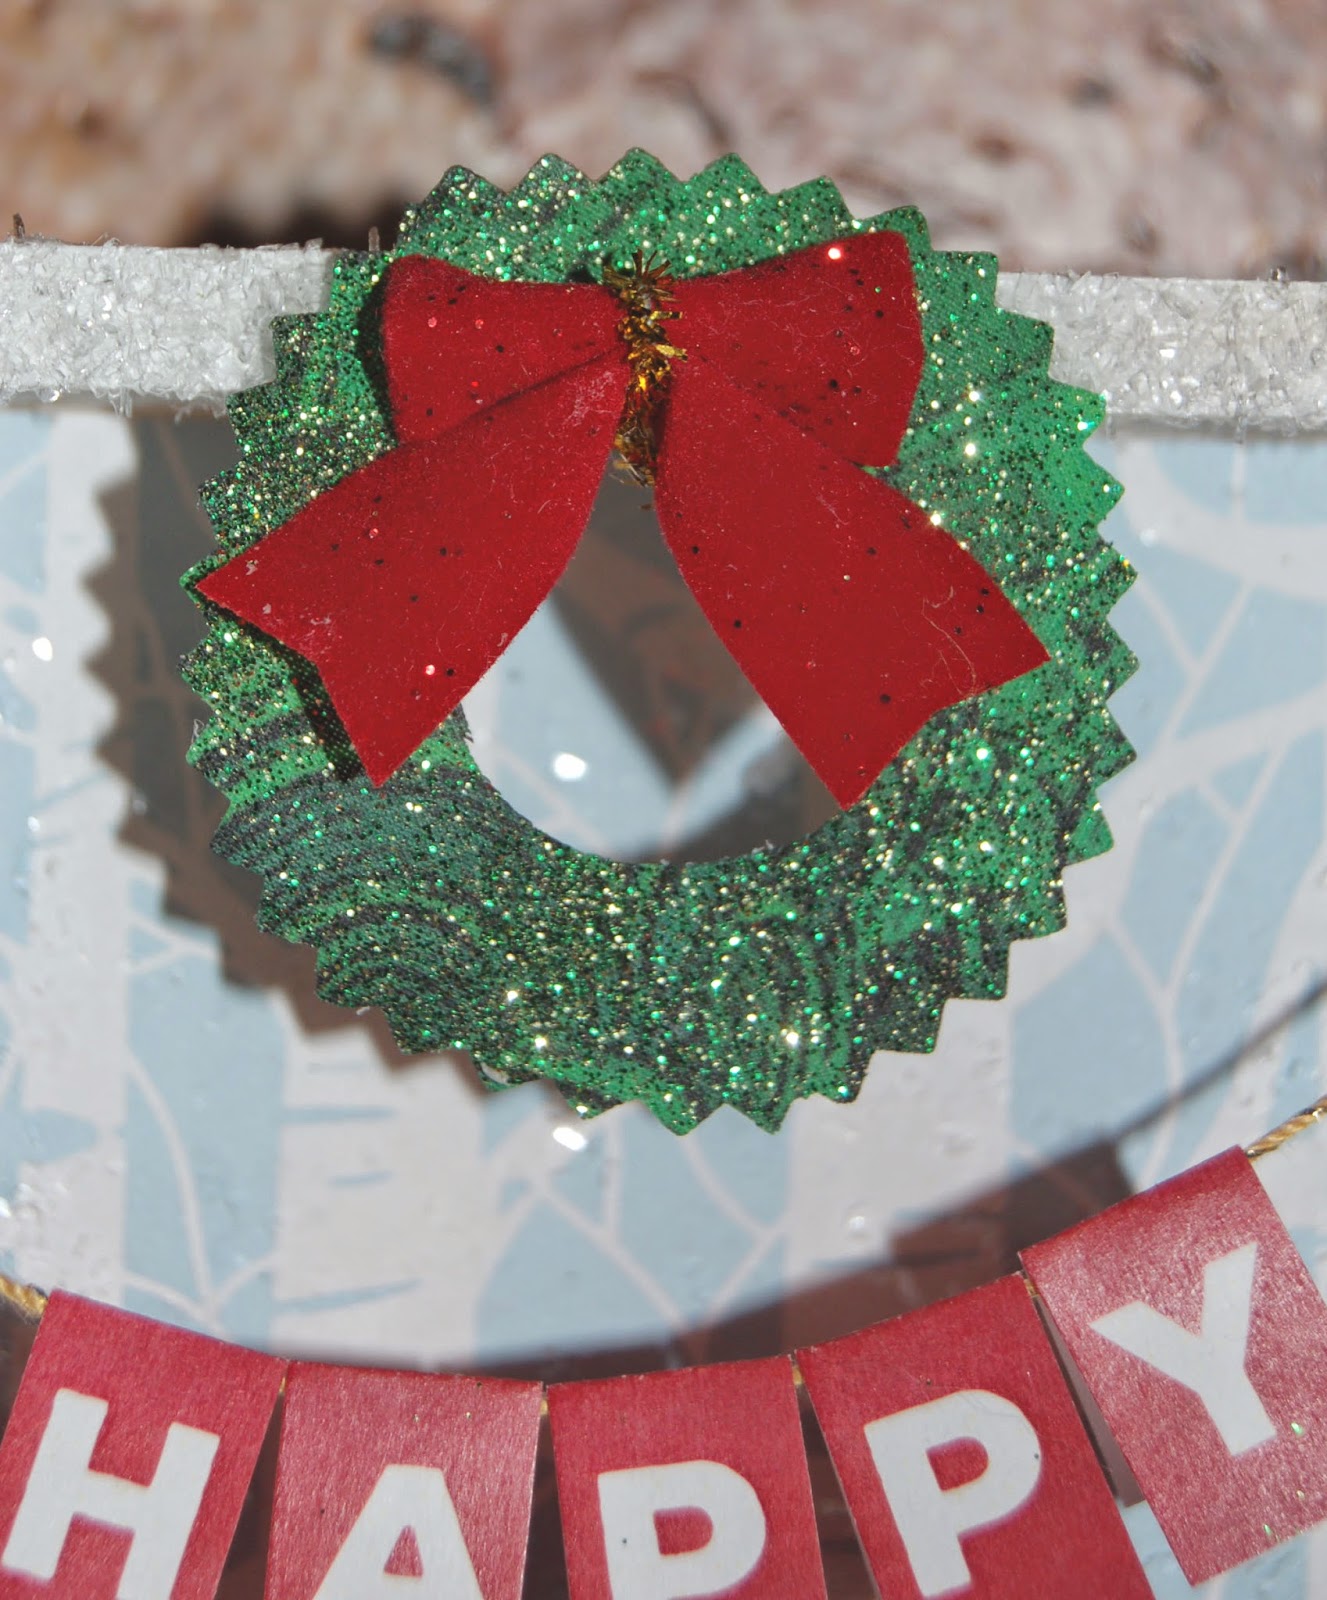
For the wreath, I cut out a circle with the pinking shears, added green glitter, glued on a bow and adhered that to the top of the box.


I lightly hammered the nails into the sides of the lid and strung my gold thread across. I cut out my banner message and folded each one over the gold thread. A bit of glue holds them in place.

Add your cotton to the bottom, glue down your trees and your deer. I embellished him with a little gold leaf...it is after all, the holidays.

Hang it on a wall or place it on a shelf. Create one every year and make sure to date the back! I believe beyond a shadow of a doubt, this will be a keepsake.

Happy Holidays!


Monday, December 8, 2014

DIY Pine Cone Jewelry

Ah, pine cones. Nature provides us with so many sizes and shapes that crafting with pine cones are fun and easy. You can make wreaths, garland, pine cone trees, fire starters, ornaments, place cards, decorations and more.

I've made frames and candle holders but I wanted to try making jewelry with the tiny ones I find all over my property. I'm not saying this is the kind of jewelry that will last forever, but it sure is fun for the holidays.


SUPPLIES NEEDED:

Brush your pine cone with the glue/adhesive size, let dry a bit, but keep tacky. Tear off a piece of gold leaf and drop your pine cone right onto it. Roll it in the gold leaf and tap it into and around the scales. Let sit for a bit and then brush off any excess leaf.

I used about 24 inches of string for my necklace. At about 12 inches, I wrapped the cord around the base of the pine cone making sure it gets into the "scales" and tied a knot. I embellished my necklace with beads and mini tassels. These would make great earrings as well. Your pine cone jewelry would probably last longer if you give it a coat of clear nail polish or clear spray.

Hope your friends will be pining over your new necklace this holiday season.


Saturday, December 6, 2014

My afternoon with the very talented animator Rachel Ryle

If you're not an Instagrammer you may not know who Rachel Ryle is, oh but one day you just might. Here's a little bio... and you must visit her site to be amazed:

"Award winning Illustrator & Animator Rachel Ryle is a social media maven of sorts. Having been named the #1 Instagram account to follow by MTV & BuzzFeed, she focuses on incorporating her art & animations into her posts. Since the launch of Instagram’s video feature Rachel has turned her stream into a collection of art & quirky stop motion animations. In only 15 seconds her short story animations are bound to leave a smile on your face. "

Rachel Ryle and me


Last year we met at Magnolia Bakery to discuss a potential partnership. During that conversation, we also discussed the phenomenon of Instagram and how I could get started. She encouraged me to create a story or character with my needle felted animals. So, I created 31 stop motion animations, called "A Heart-Felt Love Story" telling the story of how my husband and I met. You can see them here.

A Behind-the-Scenes look at "Lindy cooking dinner for Geno"


Rachel happened to be in NYC once again so we got together to discuss creating something fun and unique for Magnolia Bakery and to just catch up on the life of creating.

I wanted to thank Rachel for all her inspiration so I gifted her with this little mouse. She was staying in Williamsburg Brooklyn, so she named him William S. Burg...the perfect name for this mouse.

Facci Designs needle felted mouse, William S. Burg


Wednesday, December 3, 2014

A Candy Jar Winter Wonderland Globe

Here's a fun project to do with the kids. Any jar would do but I used a small candy jar with a fancy lid.


Here are the supplies you'll need.


The lid of your jar will become the base of your globe. Place a sticker on the front of the jar and on top (to let some light in) and paint your jar.


While the paint is wet, sprinkle on some glitter. Let dry and carefully peel away stickers. Adhere the pearl trim around the outside of your openings. Glue on your bow or embellishment of choice.


Cut a styrofoam ball in half and place inside lid. Depending on what type of lid it is, you might want to add some fake snow or cotton around to hide the styrofoam. Glue your animal (or a mini Christmas tree!) to the styrofoam (a glue gun might be your best bet here).

Find some background art you like, it could be a photograph or a drawing or use mine! Place in back of jar. I didn't need to glue it, it just stayed in place. Place jar on lid and enjoy!

The jar looks best when it is near a light source.

Happy Holidays!


Monday, December 1, 2014

Before and After Dutch Door Revealed

To create more kitchen wall space, the former owner covered up a charming Dutch door that leads out to the courtyard.

Well, we couldn't have that! I have a thing for dutch doors...we have one in our Woodstock cottage. And, its as short as this Dutch door. I'm constantly telling people to duck before they come in... I guess I'll keep telling them.


Kitchen Before

Viola!
 
The door with all its original hardware intact


Me and my respirator. A must-have accessory in this old house.