

Monday, October 24, 2011
Mice are Nice
I love making these little chocolate mice for Halloween. It's just melted chocolate, crushed chocolate cookie crumbs and a bit of sour cream to hold it together. Chill for an hour then roll about a tablespoon into ball, coat with more crumbs and then shape into a "mouse". Add some pumpkin seeds for ears, licorice for a tail, red nonpareils for eyes... and you have yourself some nice mice.

Wednesday, October 5, 2011
Halloween Pumpkin Carving Template Book
It’s been a tradition for almost seven years now to carve
pumpkins for my friend’s kids. I may not see or talk to my friend as
often as I’d like, but every October we have a standing date to create
some Halloween fun. I let the kids design the pumpkin and then I carve
it.
 Since her sons usually
have some difficulty coming up with a face idea for their
jack-o’-lantern, this year I put together a fun booklet they can flip
through to get more than 100 different face ideas. I’d like to share it
with you … enjoy!
Since her sons usually
have some difficulty coming up with a face idea for their
jack-o’-lantern, this year I put together a fun booklet they can flip
through to get more than 100 different face ideas. I’d like to share it
with you … enjoy!

WHAT YOU NEED:
Step 1: Print each page of the pumpkin templates on cardstock. You’ll have 14 individual cards, including front and back cover. (Again, you’ll need Adobe Reader to open)
Step 2: Trim out each card with scissors or an X-acto knife:

 Step 4: Punch three holes along the edge of each card, including the front and back cover:


WHAT YOU NEED:
- Pumpkin page templates (you’ll need Adobe Reader to open)
- Cardstock
- Printer
- Ruler
- X-acto knife or scissors
- Hole punch
- Ribbon
Step 1: Print each page of the pumpkin templates on cardstock. You’ll have 14 individual cards, including front and back cover. (Again, you’ll need Adobe Reader to open)
Step 2: Trim out each card with scissors or an X-acto knife:

Step 3: Starting at black edge, cut each card — excluding the front and back cover — along dotted lines:


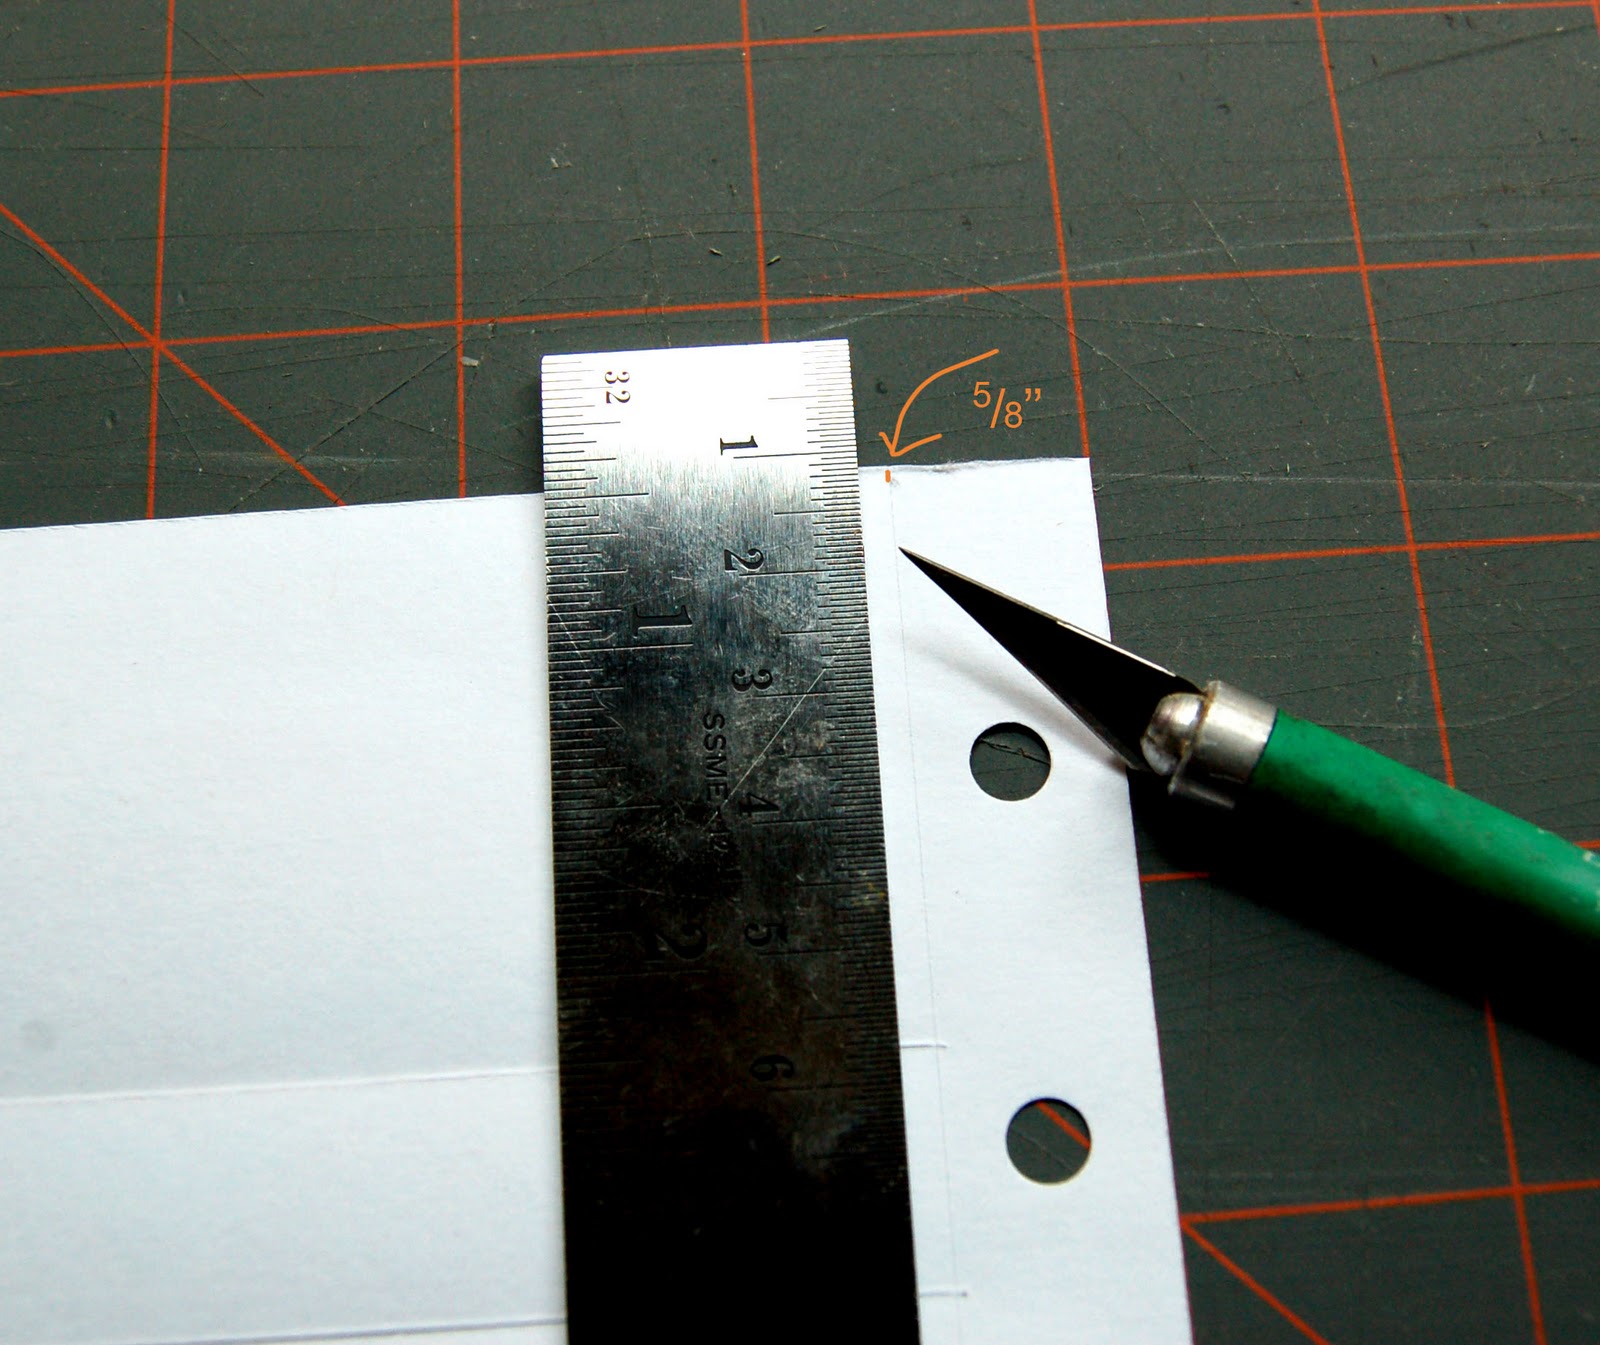
Step 5: Turn
each card over and score lightly with an X-acto blade, 5/8″ from the
edge of hole-punched side. (This will help the booklet flip better.) Be
sure to not cut all the way through! Fold flap towards front:
Step 6: Stack all cards together (no particular order is necessary). Thread ribbon through top and bottom holes, as shown:

Step 8: Place ribbon, as shown, and tie a knot or bow:

Step 9: Flip through your booklet, separating each piece to create more than 100 different pumpkin faces!

Step 10: Happy pumpkin carving!

Subscribe to:
Posts (Atom)